What happens when shredded fabric becomes the material for a piece of wall art?
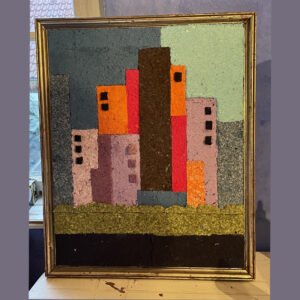
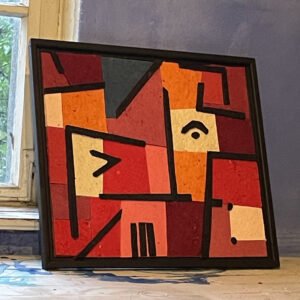
These two artworks offer an answer. One is a geometric portrait made from blocks of colour. The other depicts a cityscape, with individual shapes forming the buildings.
Both are made using shredded textile fibres rather than conventional paint.
The difference is most noticeable in the surface. The fibres create a rough, tactile finish, with naturally irregular edges around each area of colour. Black lines separate the shapes and define the composition, giving both pieces a clean, geometric structure.
Once framed, the texture becomes part of the overall composition rather than just a detail of the material.
In this article, I’ll show how textile fibres can be prepared and used to make raised collage art, from planning the composition to applying the material and adding the final details.
From Fabric Scraps to an Art Material
The process starts with shredded fabric.
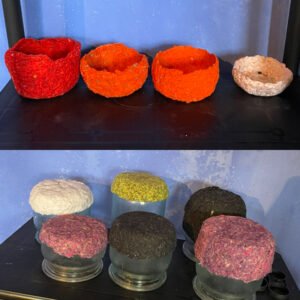
Old textiles, nonwoven fabric and other suitable textile offcuts can be processed into loose fibres. By shredding materials of different colours separately, I can prepare a range of colours for different parts of a composition.
The fibres are not simply a substitute for paint. Their texture influences the appearance of the finished work, so the material itself becomes part of the design.
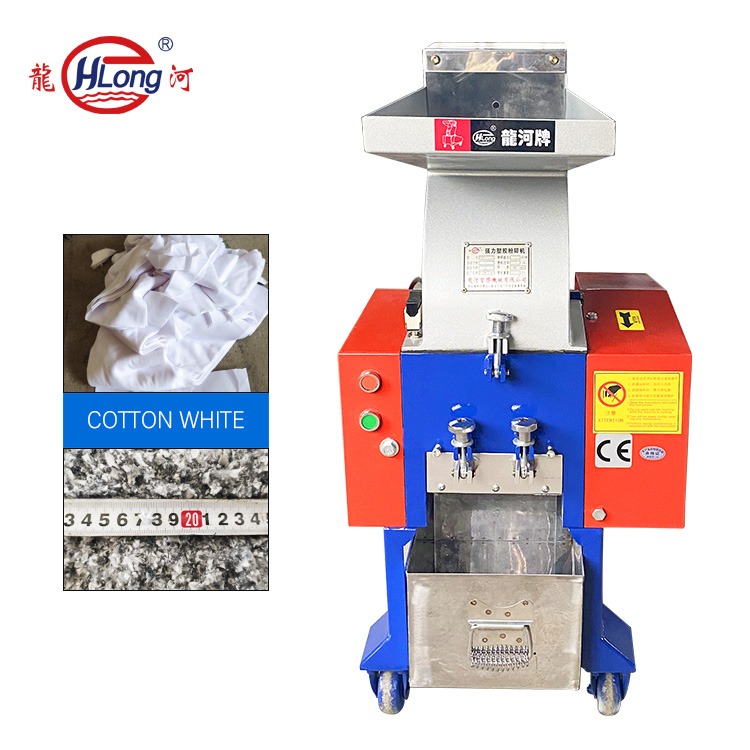
I use the PF180C-2 fabric shredder to prepare the material for my projects. Before I had this machine, processing the fabric took much more time and effort. Now I can prepare the amount I need much more quickly.
The artwork takes shape later, through the arrangement of colours, the thickness of the layers and the details added by hand.
How to Make a Raised Textile Collage
This is one way to turn shredded textile fibres into a textured wall piece.
Materials
- – Shredded textile fibres, preferably sorted by colour
- – A wooden panel or rigid artist’s board
- – Wallpaper paste and wood glue
- – A craft knife, mixing containers, a small spatula and tweezers
- – Black fibre material or narrow strips for outlines
- – A frame, if required
1. Draw the Composition
Start by sketching the design onto the board. Geometric portraits and cityscapes both work well because they can be divided into clearly defined areas.
Mark the boundaries between the colours before applying any material. This makes it easier to keep the composition organised as you work.
2. Mix the Fibres with the Adhesive
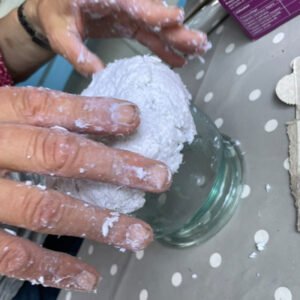
Place the prepared fibres in a container and gradually mix them with the wallpaper paste and wood glue.
Adjust the mixture until it forms a thick paste that can be spread and shaped without running. The exact consistency may vary depending on the fibres and the adhesive used.
It is worth testing a small batch first to see how the mixture handles and dries.
3. Fill in the Colour Areas
Apply the fibre mixture to the corresponding sections of the drawing, working on one colour area at a time.
Use a small spatula to distribute the material and shape the surface. There is no need to make it perfectly smooth. Leaving the fibres visible is part of what gives the piece its texture.
Allow adjacent sections to set sufficiently before working on them, especially where the colours meet. This helps keep the boundaries distinct.
4. Add the Black Lines and Smaller Details
Once the coloured sections have dried enough to hold their shape, add the black dividing lines.
These can be made from a darker fibre mixture or from suitable pre-cut strips. Tweezers are useful for placing small details, such as windows in the cityscape or features in the portrait.
The black lines help define the individual shapes and bring the composition together.
5. Let the Artwork Dry and Frame It
Leave the piece to dry in a well-ventilated area, following the adhesive manufacturer’s instructions. Avoid forcing the drying process, as uneven drying can affect the finished surface.
Once it is completely dry, check that the material is securely attached before framing the work.
Different Fabrics, Different Textures
The material you start with affects the result.
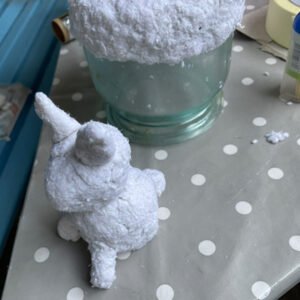
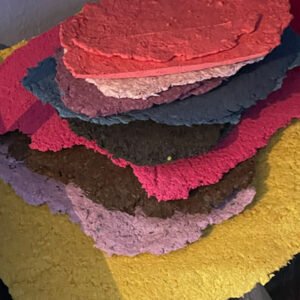
Old clothing, nonwoven fabrics and textile offcuts can all be worth experimenting with, provided they are suitable for the machine and the intended artwork. Different fabrics may produce different fibre textures, so it makes sense to test a small amount before preparing a larger batch.
Separating fabrics by colour also gives you more control over the final composition.
For this kind of work, shredding is not the finished process. It is a way to prepare the material for what comes next.
When a Fabric Shredder Becomes Part of the Studio
Fabric shredders are often associated with textile waste processing, but shredded fibres can also be used as a starting material for creative work.
For artists and studios, the relevant questions are practical: Which fabrics need to be processed? How much material is required? And what kind of fibre output will suit the intended application?
Those details help determine the appropriate machine and screen configuration. Not every fabric behaves the same way, so the material should be considered before choosing the setup.
For me, the useful part is being able to prepare the material I need without spending hours cutting and processing it by hand.
The interesting part is what happens after shredding: a discarded textile becomes a material that can be shaped, layered and worked into something new.
Frequently Asked Questions About Shredded Fabric Art
1. What can you make with shredded fabric?
Shredded fabric can be used to make textured wall art and raised textile collages. In this example, the fibres are arranged into a geometric portrait and a cityscape, with separate colour areas and black dividing lines.
The final appearance depends on the fibre material, colour arrangement, layer thickness and shaping technique.
2. What materials do you need to make textile art with shredded fabric?
For the method shown here, you need shredded textile fibres, a rigid backing board, wallpaper paste, wood glue, a small spatula, a craft knife and tweezers. Black fibre material or narrow strips can be used to create outlines and small details.
A wooden panel or rigid art board provides the base for the raised composition.
3. How do you turn shredded fabric into a paste for artwork?
Place the shredded fibres in a container and gradually mix in the wallpaper paste and wood glue. Add the adhesive mixture until the fibres form a thick paste that can be spread and shaped without running.
There is no single mixing ratio established for every fabric and adhesive combination. The correct consistency depends on the materials being used, so test a small batch before preparing the full artwork.
4. Which glue should you use for shredded fabric art?
The method described in this tutorial uses wallpaper paste and D3 wood glue. D3 is a classification for wood adhesives, but it does not by itself establish that the adhesive is suitable for every textile, backing board or artwork.
Follow the adhesive manufacturer’s instructions and test the mixture on a small sample of the actual fibres and board before starting the finished piece. Check the bond and the appearance after drying.
5. Can you use old clothes to make shredded fabric art?
Yes, suitable old clothing can be used as a source of textile fibres. Nonwoven fabric and textile offcuts are other possible materials, provided they are compatible with the shredding machine and the intended artwork.
Remove zips, buttons, metal fasteners and other hard foreign objects before shredding. Different fabrics produce different fibre textures, so test unfamiliar materials first.
6. How do you keep the colours separate in a textile collage?
Sort the shredded fibres by colour before mixing them with the adhesive. Apply one colour area at a time and allow it to set sufficiently before working on neighbouring areas.
For a design with clear geometric boundaries, use the original drawing as a guide. Add the black dividing lines and fine details after the coloured sections have dried enough to hold their shape.
7. How do you dry and frame raised textile art?
Leave the artwork in a well-ventilated area and follow the adhesive manufacturer’s drying instructions. Do not frame it until the material has dried thoroughly and the fibres are securely attached to the backing.
The required drying time depends on the adhesive, the thickness of the applied material and the surrounding conditions. A fixed drying time should not be assumed for every project.
8. Do you need a fabric shredder to make textile art?
Yes. Since I started using the PF180C-2, I can prepare the amount of shredded fabric I need much faster. I no longer have to spend so much time cutting the material with scissors or processing it in a juicer. And I don’t have to worry about damaging another juicer. Before I had this machine, I had already worn one out!