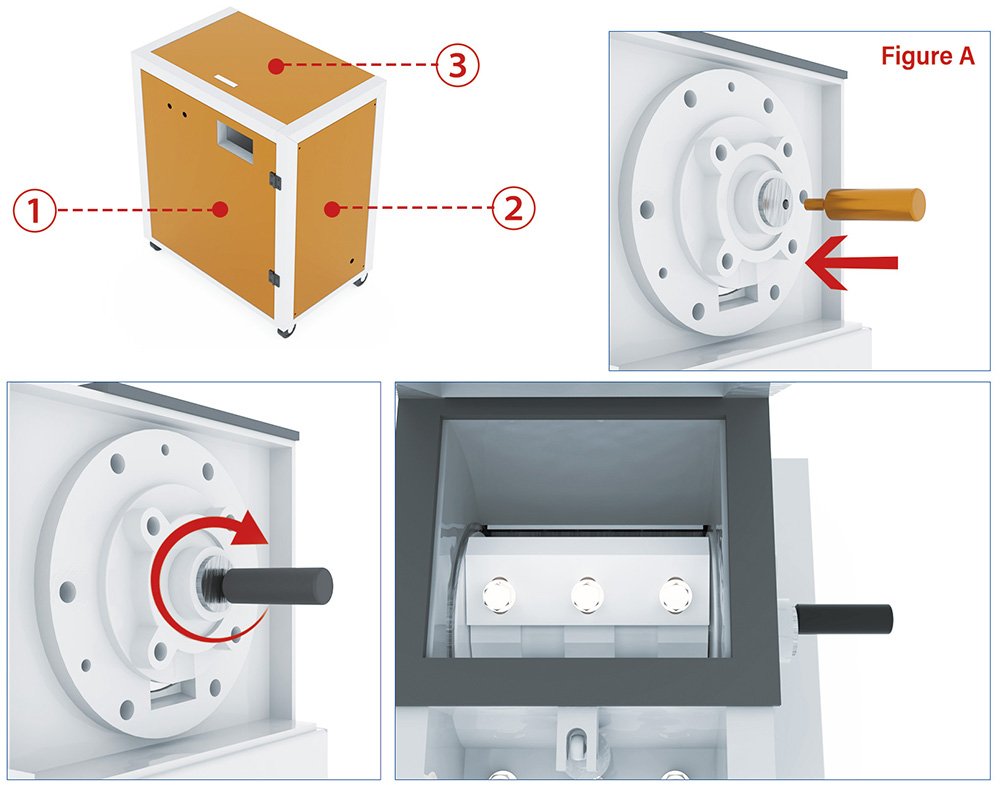
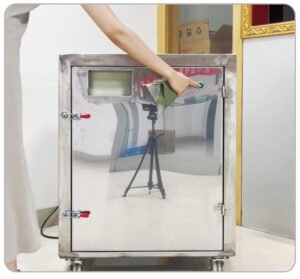
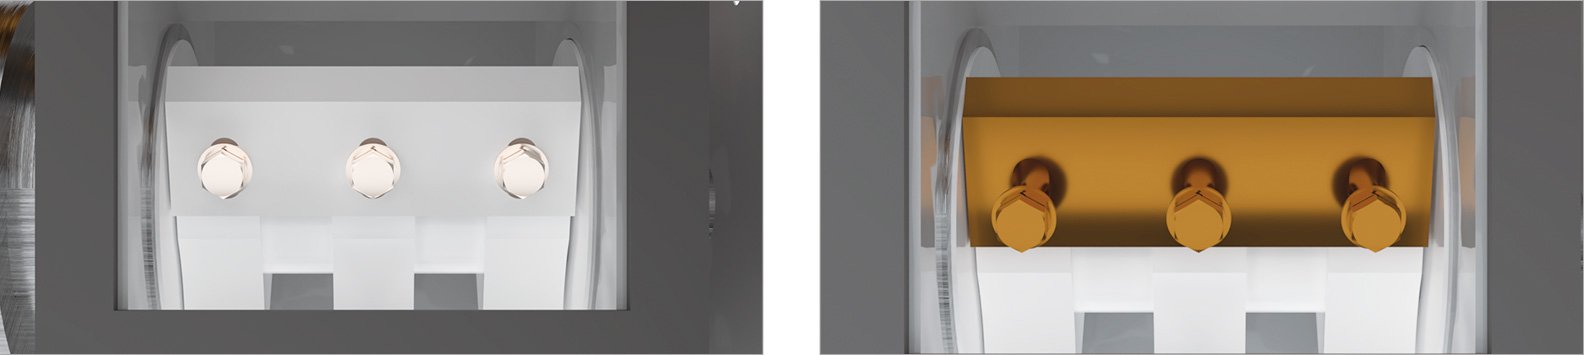
①. Open positions ①, ②, and ③. Secure the handle and slowly rotate manually to check whether the blades pass smoothly. At the same time, inspect all bolts and fasteners to ensure they are tightened properly, preventing any loosening caused during transportation.
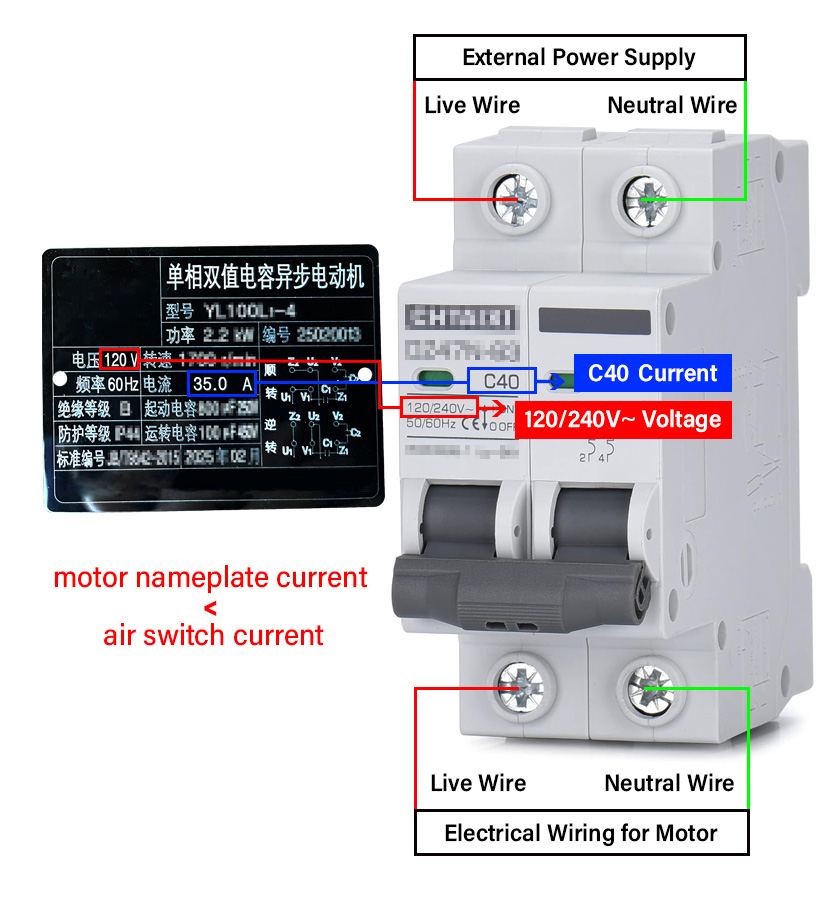
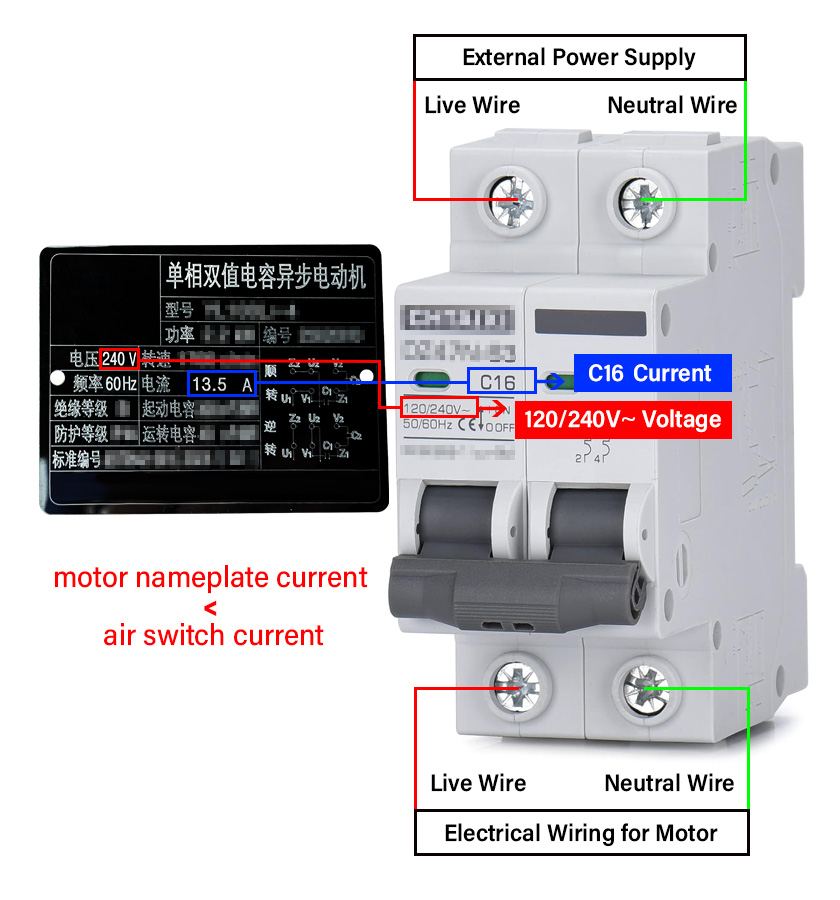
②. Verify that the external power supply voltage and specifications match the machine requirements before operation.
(1) Preparations Before Starting the Equipment:
① Install the air switch and connect the wires.
② How to choose the air switch.
③ How to install the air switch.
④ How to connect the wires.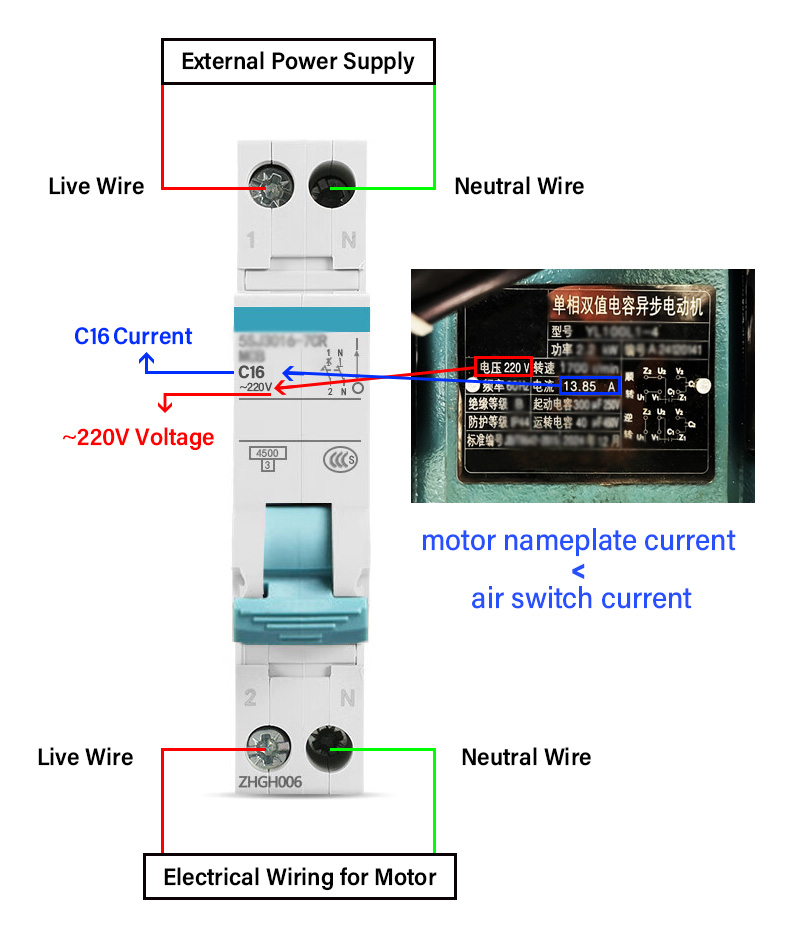
Step 1: Power On
After connecting the power cable, press the green button to start the machine. Check whether the rotation direction (Position 1) matches the arrow indicated on the machine, and listen carefully for any unusual noise.
If you hear any unusual noise, stop immediately.
Step 2: Stop & Check Rotation 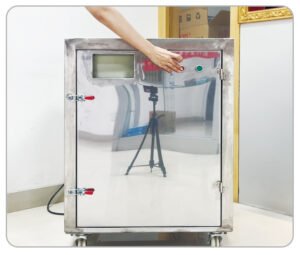
Press the red button to stop the machine. Open the left-side safety cover and check the blade rotation direction. The correct direction should match the arrow on the right side of the machine.
Step 3: Confirm & Operate Normally
If the rotation direction is correct, close the safety cover securely. Press the green button again to restart. You may now begin feeding the material into the machine for normal operation.
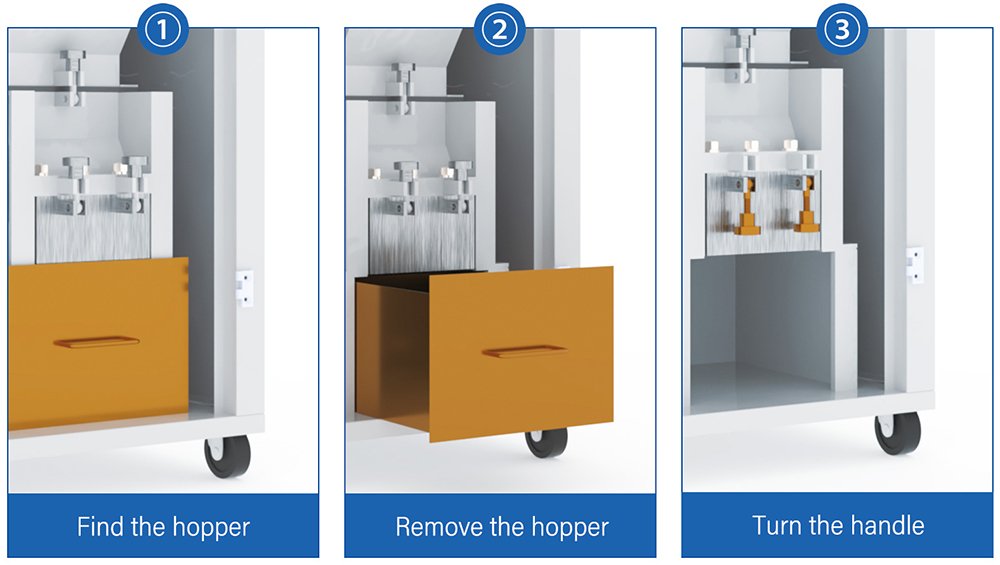
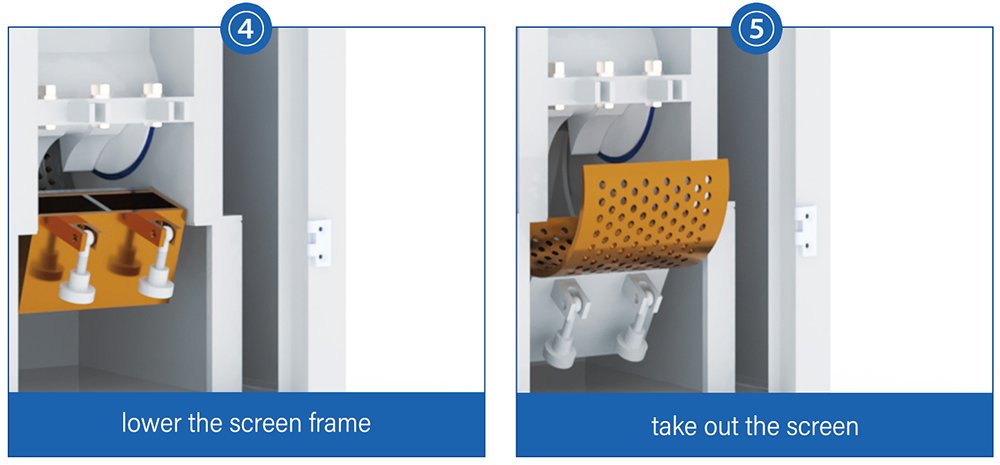
A step-by-step tutorial for replacing the screen
Step-by-Step Guide to Replacing Cutters
Step 1:
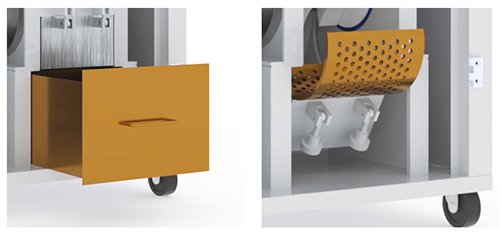
Cut off the power supply, remove the hopper and the sieve, and lower the sieve frame to gain access to the crushing chamber.
Step 2:
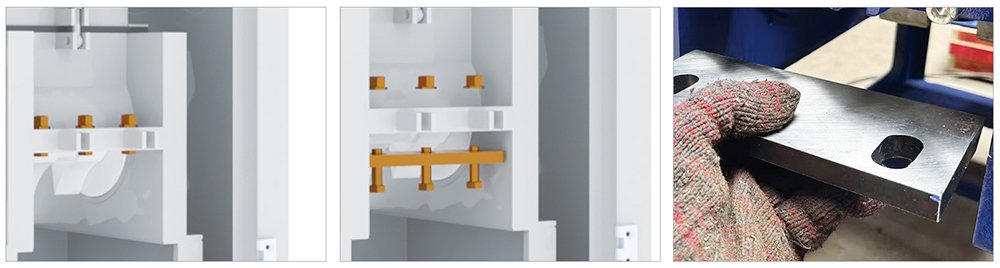
Use appropriate tools to unscrew the blade locking bolts at the front and rear of the machine body, and then remove the fixed blades.
Step 3:
Thoroughly clean the debris and dust inside the crushing chamber using a brush or air gun. (This step is crucial: If not cleaned properly, misalignment of components may occur during reassembly, which will subsequently affect the machine’s performance.)
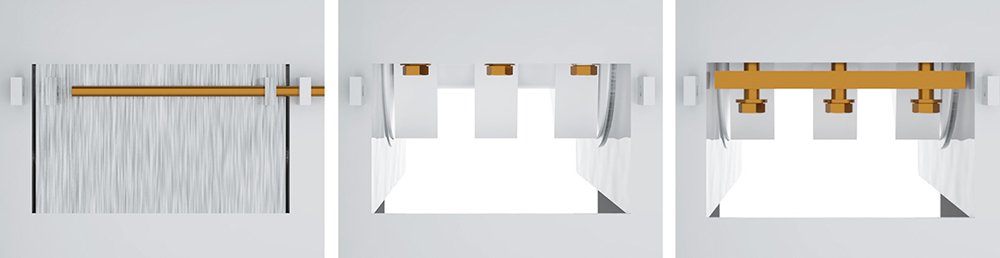
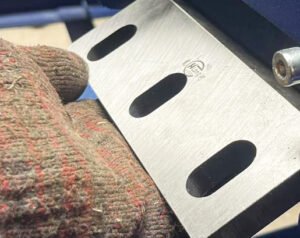
Step 4: Install the front fixed blade.
① Position the logo facing forward, with the blade edge facing inward and the back of the blade facing upward.
② Preliminarily tighten the locking screws and adjust the front-to-back spacing by fine-tuning the screw lengths.crushing chamber.
Step 5:
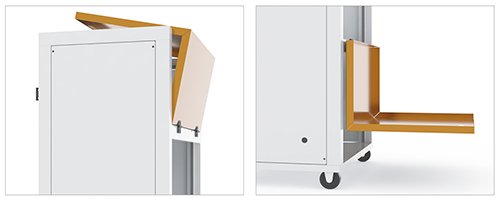
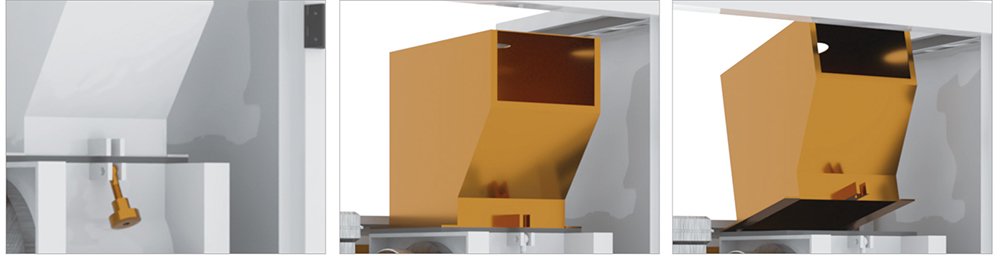
Open the protective cover on top of the machine body for operation.
Step 6:
Open the feed inlet of the equipment to ensure sufficient operating space.
Step 7:
① Install the moving blade and rotate the (In Figure A on Page 1) to check the clearance.
② Fine-tune the position of the moving blade to ensure the blade edge spacing meets the standard.
(Do not move the front fixed blade during this step.)
Step 8:Install the rear stationary blade
① Position the logo facing forward, with the blade edge facing inward and the front side of the blade facing upward.
② After securing the locking screws, adjust the front-to-ba
ck position using the adjusting screws.
③ Rotate the balancing wheel to verify: the left and right mo
ving blades pass smoothly with uniform clearance.
④ Fully tighten the rear fixed blade.
(Do not adjust the front fixed blade or moving blades during this stage.)
Step 9: Install the remaining moving blades
Install the remaining moving blades one by one. After each installation, rotate the (In Figure A on Page 1 ) to confirm:
①All moving blades can pass smoothly between the fixed blades.
② There is no jamming or abnormal friction. (During this process, do not change the positions of the front or rear fixed blades.)
Step 10: Final fastening and testing
① Tighten all blade screws again to eliminate any looseness.
② Rotate the (In Figure A on Page 1) for re-verification:
√ The blade clearances are uniform.
√ There is no abnormal vibration or noise during operation.
Step 11: Complete the assembly
Close the sieve frame, shut the feed inlet, and reassemble all the disassembled components in order to complete the entire maintenance process.